535 East Meadow Ave, East Meadow, NY 11554

Protecting Your Dog’s Ear Health
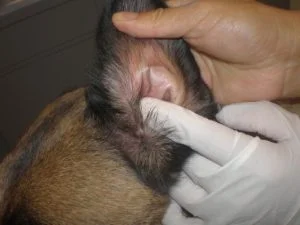
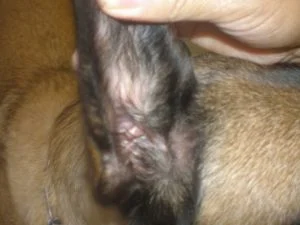
This diagram illustrates the basic anatomical landmarks of the canine ear canal. For general cleaning to be done at home the points of interest are the ear flap, vertical ear canal, and the horizontal ear canal.
The vertical canal is the longest section of the external ear. As long as cleaning is performed straight down the vertical ear canal, the horizontal canal and the ear drum will be avoided, thereby preventing injury to the ear drum.
Step-by-Step Ear Cleaning Guide
1
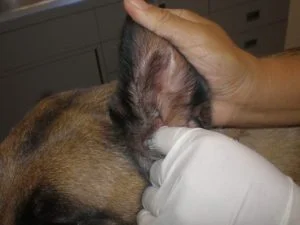
Positioning the Ear Flap
The ear flap is gently pulled up and the opening to the vertical ear canal is visualized.
2
Cleaning and Flushing the Ear Canal
Point the tip of the cleaning solution bottle into the opening of the vertical ear canal and infuse a generous amount of cleaner into the canal. The goal is to fill the entire canal (the vertical AND the horizontal canal).
Next, while holding the ear flap with one hand, massage the ear canal with the other. Some fluid and debris will likely start coming out of the ear at this point.
Release the ear and allow your dog to shake his/her head for 2-5 minutes. This will help bring more debris out. (You may want to do this in an area of the house that can get a little dirty, as ear discharge may be flying out of the ear)

3
Wipe and Remove Debris
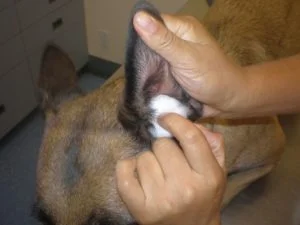
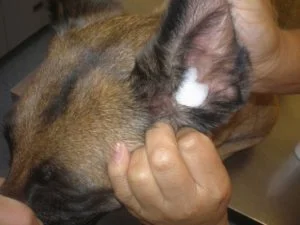
Wipe the ear clean using a cotton ball.
Another technique that can be used is to push a cotton ball into the canal and lightly soak it with the cleaner. Allow a few minutes for the cotton to dry. When the cotton is removed much of the debris will adhere to it. DO NOT push the cotton so far down that you cannot remove it. We recommend keeping a pair of tweezers available to remove the cotton if you are having trouble removing it with you fingers.
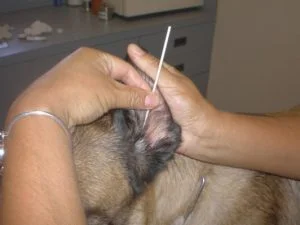
Q-tips are optional. Many veterinarians do not advocate the use of Q-tips as they can cause serious damage to the ear canal, or even the ear drum if they are not used properly. In our practice we will use Q-tips GENTLY to clean the folds of the canals that are difficult to clean with cotton balls alone. As long as you are gentle, the tip of the swab can be seen at all times, and the tip is pointing straight down and NOT TOWARDS THE HEAD this technique is usually safe.
4
Apply Medication & Monitor
Most often, an ointment is prescribed as part of the treatment. After cleaning, apply a small amount of ointment to a gloved finger (gloves can be purchased at a pharmacy of obtained from your veterinarian). Using your finger apply a coat of ointment to the entire ear canal and inside part of the ear flap. You do not need to use a lot of ointment for this. Think of the ear as having a rash and you are coating the rash with the medication. Too much ointment will make subsequent cleanings more difficult and will waste medication.
If you feel that the ears are getting worse despite the treatment, discontinue all medications and call your veterinarian. Some animals can be allergic to a component of the cleaner or to the ointment. Alternative treatments will need to be used for these patients.